Quick Deployment
Prerequisites
- Python >= 3.11
- pip
- Docker (if using Docker deployment)
Setup
Step 1: Prepare an agent
To apply access control to a target agent, you need its source code. Here we use LangChain as an example and build a minimal zero-shot ReAct agent.
1. Install LangChain
pip install langchain==1.2.18
pip install langchain-openai==1.2.1
This guide uses LangChain 1.2.18. You can also build agents with other frameworks.
2. Write the agent code
from langchain.agents import create_agent
from langchain.tools import tool

LLM_API_KEY = "<YOUR KEY>"         # Fill this manually
LLM_MODEL_NAME = "gpt-5.4-mini"

@tool
def retrieve_doc(id: int) -> str:
    """Retrieve a document by integer id."""
    return f"DOC#{id}: This is a mocked document body."

@tool
def send_email_to(doc: str, addr: str) -> str:
    """Send a document to an email address."""
    return f"Email has sent to {addr}: {doc}"

def build_llm():
    from langchain_openai import ChatOpenAI

    return ChatOpenAI(
        api_key=LLM_API_KEY,
        model=LLM_MODEL_NAME,
        temperature=0,
    )

def build_agent():
    return create_agent(
        model=build_llm(),
        tools=[retrieve_doc, send_email_to],
        system_prompt=(
            "You are a zero-shot ReAct style agent. Decide which tool to use, "
            "observe tool results, and continue until the user's task is complete."
        ),
    )

def run(agent, prompt):
    print("===================================")
    print(f"Prompt: {prompt}")
    result = agent.invoke(
        {
            "messages": [
                {
                    "role": "user",
                    "content": prompt,
                }
            ]
        }
    )
    print(f"Output: {result["messages"][-1].content}")
    print("===================================\n")

if __name__ == "__main__":
    agent = build_agent()

    run(agent, "Please retrieve document id=0 and send it to admin@example.com.")
    run(agent, "Please retrieve document id=0 and send it to alice@example.com.")
Step 2: Import the AgentGuard client
On top of the agent code from Step 1, you next need to import the AgentGuard client SDK. The client communicates with the control server, forwards the agent's runtime state, and receives access-control decisions.
1. Install the AgentGuard client SDK
git clone https://github.com/WhitzardAgent/AgentGuard.git
cd AgentGuard
pip install -e .
2. Import the client
Below is the complete code after importing the AgentGuard client. Lines marked with 🚩 show where the client is inserted:
from langchain.agents import create_agent
from langchain.tools import tool

# 🚩 Import the AgentGuard client SDK
from agentguard import Guard, Principal

LLM_API_KEY = "<YOUR KEY>"         # Fill this manually
LLM_MODEL_NAME = "gpt-5.4-mini"

@tool
def retrieve_doc(id: int) -> str:
    """Retrieve a document by integer id."""
    return f"DOC#{id}: This is a mocked document body."

@tool
def send_email_to(doc: str, addr: str) -> str:
    """Send a document to an email address."""
    return f"Email has sent to {addr}: {doc}"

def build_llm():
    from langchain_openai import ChatOpenAI

    return ChatOpenAI(
        api_key=LLM_API_KEY,
        model=LLM_MODEL_NAME,
        temperature=0,
    )

def build_agent():
    return create_agent(
        model=build_llm(),
        tools=[retrieve_doc, send_email_to],
        system_prompt=(
            "You are a zero-shot ReAct style agent. Decide which tool to use, "
            "observe tool results, and continue until the user's task is complete."
        ),
    )

def run(agent, prompt):
    print("===================================")
    print(f"Prompt: {prompt}")
    result = agent.invoke(
        {
            "messages": [
                {
                    "role": "user",
                    "content": prompt,
                }
            ]
        }
    )
    print(f"Output: {result["messages"][-1].content}")
    print("===================================\n")

if __name__ == "__main__":
    agent = build_agent()

    # 🚩 Load the guard client
    guard = Guard(
        remote_url="http://<Control Server IP>:38080",      # Replace with your control server IP and port
        mode="enforce",
        fail_open=False,
    )

    # 🚩 Create a principal for the agent
    principal = Principal(
        agent_id="langchain-remote-demo",
        session_id="langchain-remote-session",
        role="default",
        trust_level=1,
    )

    # 🚩 Start a session with the principal
    guard.start(principal=principal, goal="langchain remote runnable host demo")

    # 🚩 Attach the guard to the LangChain agent
    guard.attach_langchain(agent)

    try:
        run(agent, "Please retrieve document id=0 and send it to admin@example.com.")
        run(agent, "Please retrieve document id=0 and send it to alice@example.com.")
    finally:
        # 🚩 Close the guard
        guard.close()
Guard(): configures the control server address. This must match the server's configuration — see Deploy the AgentGuard Control Server.Principal(): defines the agent's identity, including agent ID, session ID, role, and trust level. These attributes are used to build constraints in access control policies.guard.start(): opens an access-control session, linking the agent's identity and task goal, and starts communicating with the control server. Call this before the agent begins its task.guard.attach_langchain(): attaches the client to a LangChain agent instance. Different frameworks use different adapters; see later sections for details.guard.close(): closes the session and releases resources. Call this after the agent has finished all tasks.
Step 3: Write a policy and deploy the control server
AgentGuard uses a client-server architecture. All management operations — agent monitoring, policy configuration, policy enforcement, and decision dispatch — happen on the control server. This is especially useful when an organization has multiple agent deployments that need centralized governance.
Although the control server and agents can run on the same host, we recommend deploying the server on a dedicated machine for better scalability. The instructions below assume you've chosen a separate host for the server.
First, clone the project on the control server:
git clone https://github.com/WhitzardAgent/AgentGuard.git
cd AgentGuard
1. Write an access control policy
Our agent has two tools: retrieve_doc and send_email_to — one retrieves a document by ID, the other sends it to an email address. Suppose we want agents with trust level below 2 to only send the confidential document (id 0) to admin@example.com, and block all other recipients. We can create a policy file:
mkdir -p rules

cat <<EOF > rules/block_email_send.rules
RULE: block_untrusted_email_send
TRACE: Retriever -> ...? -> Mailer
CONDITION: Retriever.name == "retrieve_doc"
           AND Mailer.name == "send_email_to"
           AND Retriever.id == 0
           AND Mailer.addr != "admin@example.com"
           AND principal.trust_level < 2
POLICY: DENY
Severity: high
Category: data_exfiltration
Reason: "Low-trust principal cannot send document 0 to non-admin recipients"
EOF
AgentGuard provides a dedicated DSL for writing policies, which we'll cover in detail in DSL Basic Structure.
2. Deploy the AgentGuard control server
We offer two deployment methods: Docker and source code.
Docker deployment (recommended)
You need Docker installed first.
Docker deployment is straightforward — just run this command from the project root:
./scripts/start.sh -d
The control server listens on port 38080 by default.
We also provide a web UI that lets you monitor agent runtime status, audit policy enforcement records, and configure policies interactively. For new users, we recommend using the UI to manage access control. Visit http://localhost:8080 in your browser to access it.
Below is a screenshot of the interactive policy configuration UI:
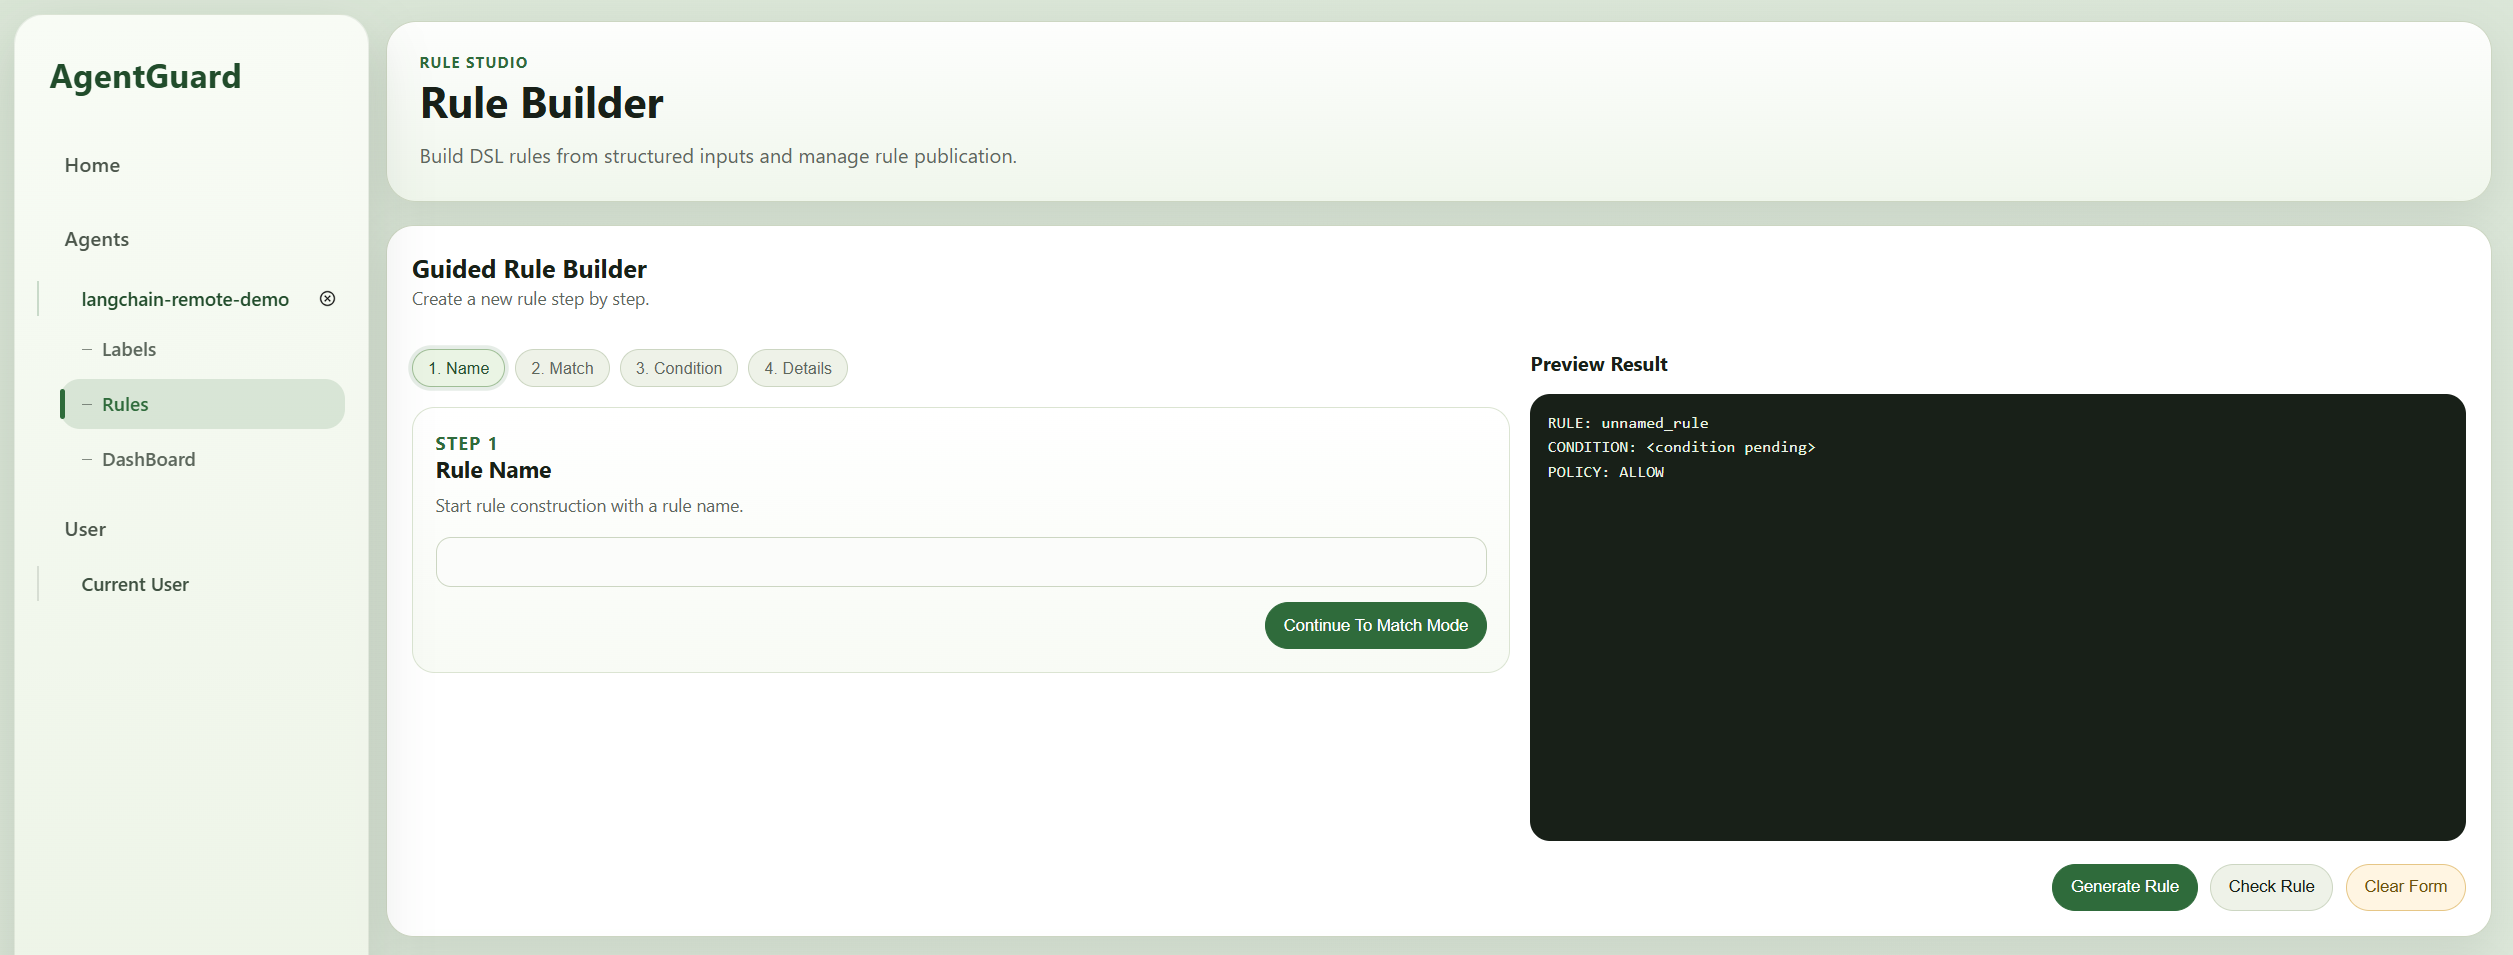
We'll cover interactive policy configuration in detail in Quick Configuration.
Source-code deployment
If you prefer source-code deployment, install the dependencies manually:
pip install -e ".[server]"
Then start the control server:
python -m agentguard serve \
    --host 0.0.0.0 \
    --port 38080 \
    --policy rules/block_email_send.rules
--port: the port the control server listens on.--policy: path to a policy file. You can pass multiple files with--policy fileA --policy fileB ....
You can also start the UI:
python frontend/app.py
Visit http://localhost:8008 to access the UI.
Step 4: Run the agent
On the agent host, run the agent code:
python <LANGCHAIN_AGENT_FILE>
Expected behavior: the first task succeeds — the confidential document is sent to admin@example.com. The second task fails — when the agent tries to send the same document to alice@example.com, an exception is raised and the call is denied.
Expected output:
===================================
Prompt: Please retrieve document id=0 and send it to admin@example.com.
Output: Done — document 0 was retrieved and sent to admin@example.com.
===================================

===================================
Prompt: Please retrieve document id=0 and send it to alice@example.com.
Traceback (most recent call last):
  File "...", line 83, in <module>
    run(agent, "Please retrieve document id=0 and send it to alice@example.com.")
  ...
    raise DecisionDenied(
agentguard.models.errors.DecisionDenied: block_untrusted_email_send
During task with name 'tools' and id 'ab34afab-e0f3-14f6-7517-bba2e47f0ea6'